TABLE OF CONTENTS
- Product Overview
- Quick Reference
- What's in the Box
- Parts & Controls
- Using Airlo as a Handheld Fan
- Using Airlo as a Desk Fan
- Fan Speed Control
- LED Light Control
- Charging Airlo
- Battery Runtime
- Care & Safety
- Still stuck?
Product Overview
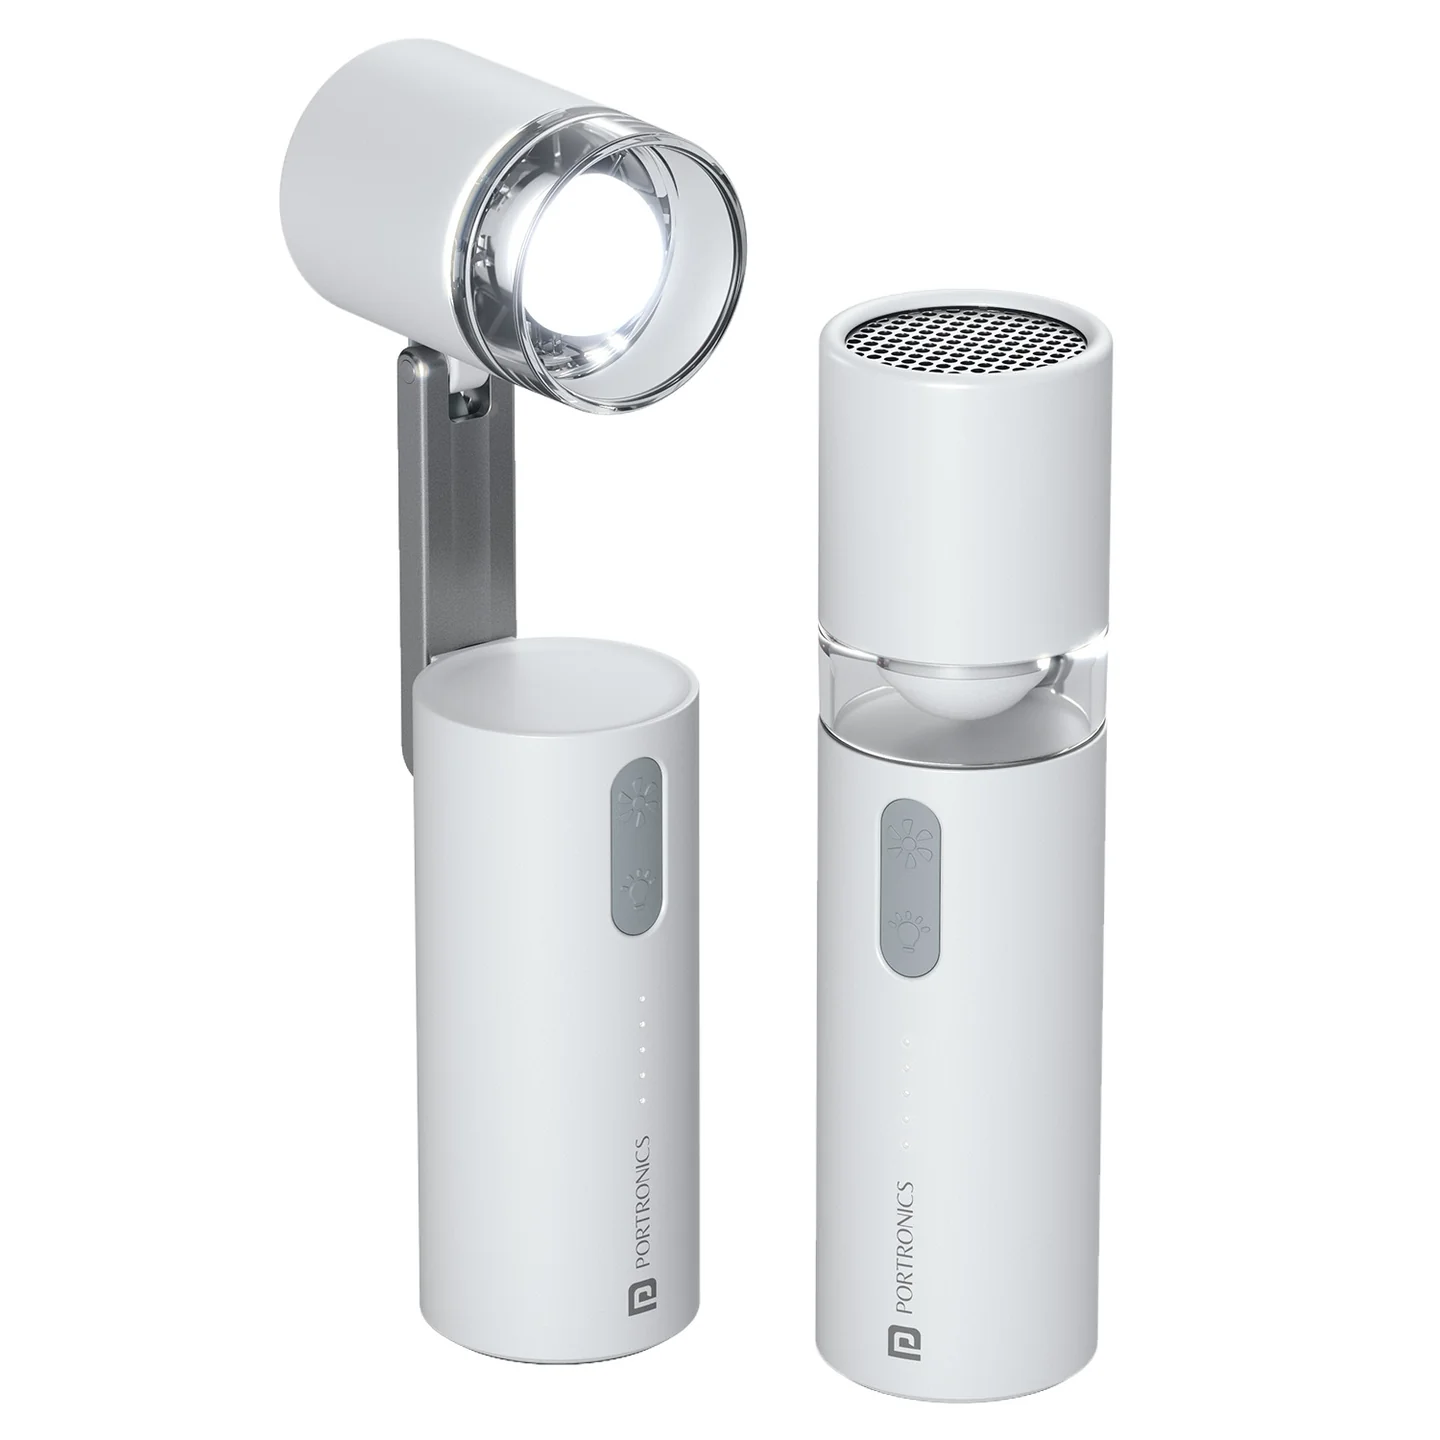
The Portronics Airlo is a portable rechargeable handheld fan with a built-in LED light. Its compact design can be used as a handheld fan or placed on a flat surface as a desk fan. The adjustable fan head lets you direct airflow where needed.
Quick Reference
| Feature | Details |
|---|---|
| Product | Portronics Airlo |
| Product Code | POR 3511 |
| Battery | 3000mAh lithium-ion |
| Speed Levels | 5 modes |
| Maximum Speed | Up to 18,000 RPM |
| Runtime | Up to 10 hours, depending on speed and use |
| Charging Port | USB Type-C |
| Charging Input | 5V / 2A |
| Charging Time | Up to 4 hours |
| LED Light | Low, Medium, High and Flash modes |
| Design | Handheld or desktop use |
| Base | Anti-slip base |
What's in the Box
| Item | Quantity |
|---|---|
| Airlo Portable Fan | 1 |
| Charging Cable | 1 |
| User Manual | 1 |
| Lanyard | 1 |
Parts & Controls
| Part / Control | Function |
|---|---|
| Fan Switch | Turns the fan on and cycles through the 5 speed levels |
| Light Switch | Cycles through the LED light modes |
| Adjustable Head | Directs airflow at the desired angle |
| Connecting Arm | Connects the fan head to the base |
| Base | Supports the fan on a flat surface |
| Anti-slip Silicone | Helps keep the fan stable |
| Indicator Light | Shows battery status |
| Type-C Charging Port | Connects the charging cable |
| Lanyard Hole | Attachment point for the included lanyard |
Using Airlo as a Handheld Fan
- Hold the fan securely by its body or handle.
- Adjust the fan head to direct airflow where needed.
- Press the Fan Switch to turn the fan on.
- Press the button repeatedly to cycle through speed levels 1 to 5.
- Press again after Speed 5 to turn the fan off.
To switch the fan off directly from any speed, press and hold the Fan Switch.
Using Airlo as a Desk Fan
- Place the fan on a flat, stable surface.
- Adjust the fan head to the required angle.
- Make sure the anti-slip base is stable and the air inlet and outlet are unobstructed.
- Use the Fan Switch to select the desired speed.
Do not place the fan on an uneven or unstable surface.
Fan Speed Control
Each press of the Fan Switch changes the speed in sequence:
Off → Speed 1 → Speed 2 → Speed 3 → Speed 4 → Speed 5 → Off
- Start at a lower speed for gentle airflow.
- Select a higher speed when stronger airflow is needed.
- Press and hold the Fan Switch to turn the fan off directly from any speed.
LED Light Control
The built-in LED light has four light modes and an OFF setting.
- Press the Light Switch to cycle through the modes.
- The sequence is Low → Medium → High → Flash → Off.
- Press and hold the Light Switch to turn the light off from any mode.
The light can be used for added visibility during low-light situations.
Charging Airlo
- Connect the Type-C charging cable to the fan's charging port.
- Connect the other end to a suitable 5V/2A USB adapter.
- Check the indicator light to confirm the battery status.
- Allow up to 4 hours for charging.
Battery Indicator
| Indicator | Meaning |
|---|---|
| White LED flashing | Low battery |
| White LED steady | Fully charged |
Use a suitable charging adapter and avoid using damaged cables or adapters.
Battery Runtime
Airlo comes with a 3000mAh battery and runtime of up to 10 hours. Actual runtime varies with the selected fan speed and use of the LED light.
Higher fan speeds generally consume more battery, so choose a lower speed when longer runtime is needed.
Care & Safety
- Do not insert fingers or objects into the fan while it is operating.
- Keep the fan away from water and moisture.
- Do not use damaged charging cables or adapters.
- Avoid dropping or dismantling the device.
- Keep the product out of reach of children.
- Do not overcharge the device; disconnect it after charging is complete.
- Use recommended charging accessories.
- Store the fan in a cool, dry place.
- Use it on a flat surface for stable desktop airflow.
- Clean the air vents regularly.
- Do not block the air inlet or outlet.
- Switch the fan off before cleaning or storing it.
Still stuck?
If the issue persists after performing all troubleshooting steps, please raise a support request.
Our support team will assist you further.
Support
- Visit: www.portronics.com
- Support Portal: support.portronics.com
Was this article helpful?
That’s Great!
Thank you for your feedback
Sorry! We couldn't be helpful
Thank you for your feedback
Feedback sent
We appreciate your effort and will try to fix the article