TABLE OF CONTENTS
- Product Overview
- Quick Reference
- What's in the Box
- Parts & Controls
- Installing a Nozzle
- Powering ON
- Using Blower Mode
- Using Vacuum Mode
- Charging Instructions
- Indicator Light Guide
- HEPA Filter & Maintenance
- Blockage Protection
- Safety Precautions
- Troubleshooting
- Still stuck?
Product Overview
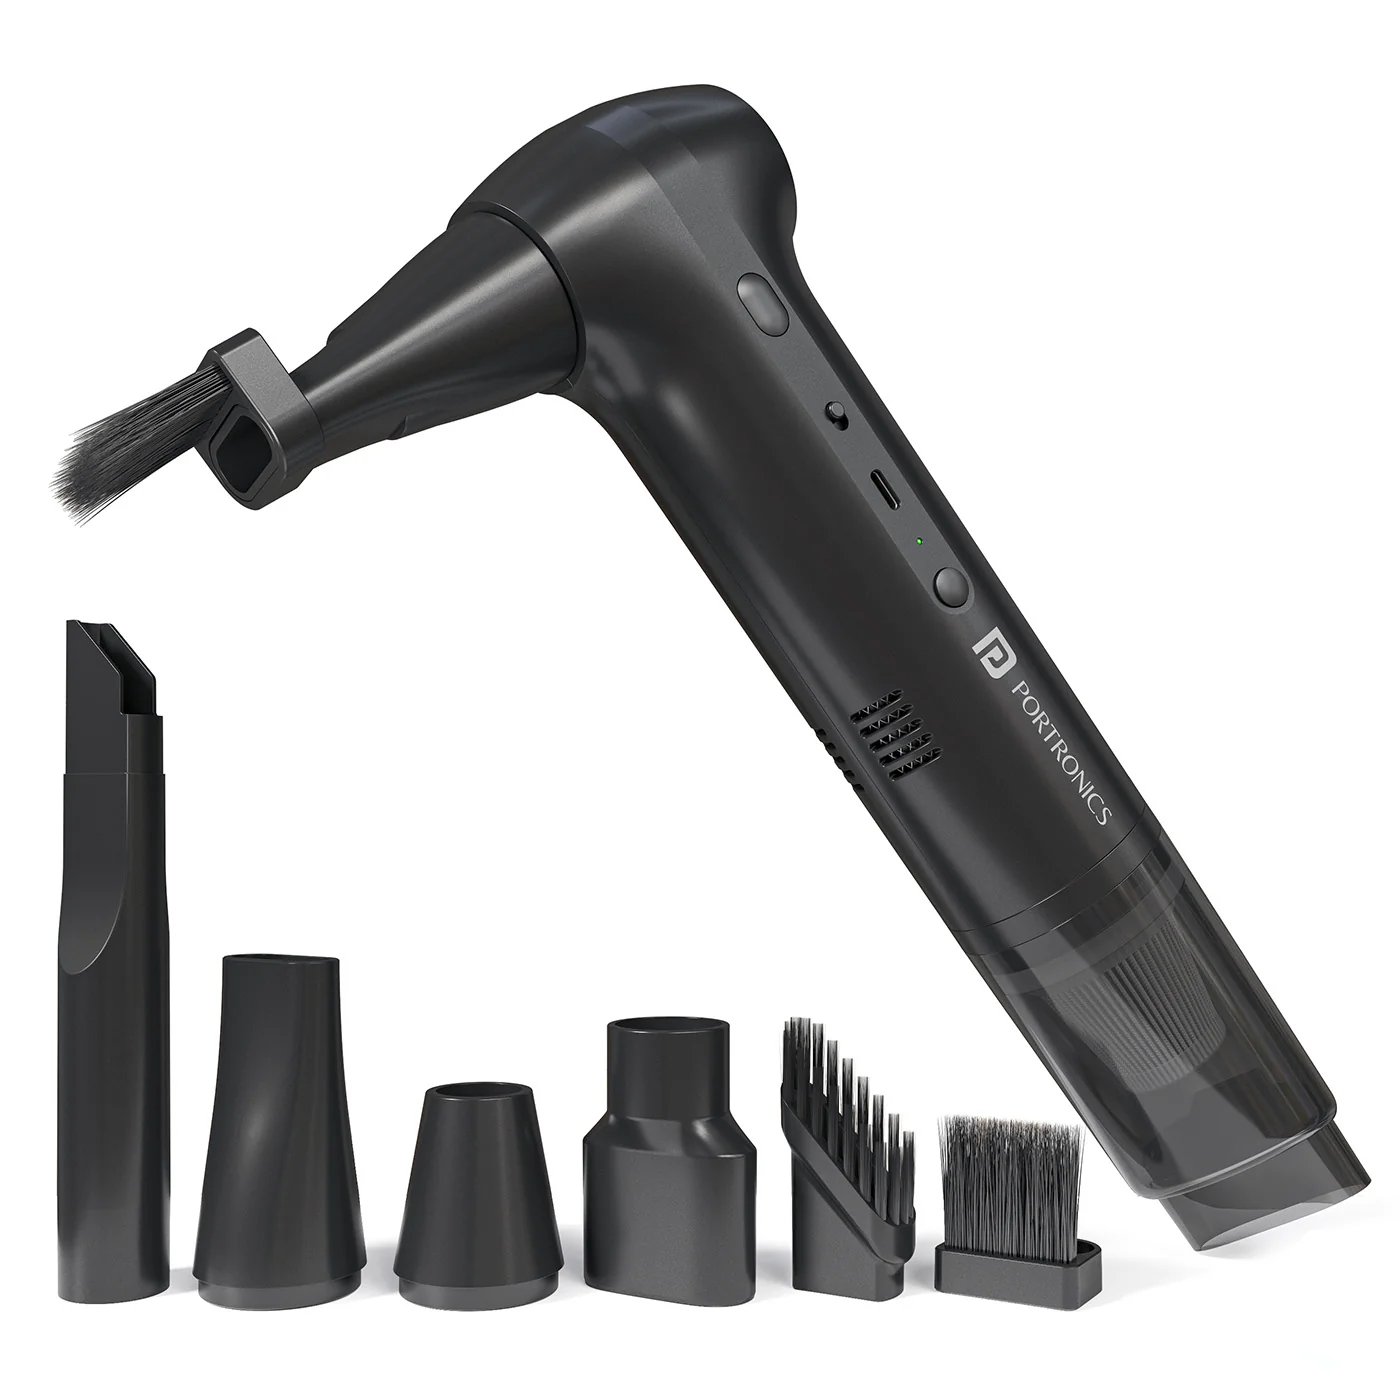
The Portronics AirCop (POR 3068) is a cordless 2-in-1 vacuum cleaner and air blower for everyday cleaning. Use the vacuum function to collect dust and debris, or switch to blower mode to clear dust from hard-to-reach areas such as keyboards, computer equipment, car interiors and vents.
The device uses dual BLDC motors, a washable HEPA filter and USB Type-C charging.
Quick Reference
| Feature | Details |
|---|---|
| Product | Portronics AirCop |
| Product Code | POR 3068 |
| Colour | Black |
| Product Type | 2-in-1 Vacuum & Air Blower |
| Motor | Dual BLDC motors |
| Blower Speed | Up to 130,000 RPM |
| Suction Power | 16,000 Pa |
| Rated Power | 150W |
| Battery Capacity | 3 × 2000mAh |
| Charging Input | 5V/2A |
| Charging Port | USB Type-C |
| Vacuum Runtime | Up to 60 minutes |
| Blower Runtime | Up to 30 minutes |
| Filter | Washable HEPA filter |
| Warranty | 12 months |
Actual runtime may vary depending on the selected speed, workload and usage conditions.
What's in the Box
| Item | Quantity |
|---|---|
| AirCop Device | 1 |
| Vacuum / Blower Nozzles | 4 |
| Type-C Cable | 1 |
Parts & Controls
| Part / Control | Function |
|---|---|
| HEPA Filter | Filters dust collected during vacuum operation |
| Blower Button | Activates blower mode and cycles through 3 speed levels |
| Power Button | Switches the device ON |
| Vacuum Button | Activates vacuum mode and cycles through 2 speed levels |
| Type-C Charging Port | Connects the charging cable |
| Nozzle Attachment | Directs suction or airflow for the cleaning task |
| Indicator Light | Shows operating, charging and battery status |
Installing a Nozzle
- Select the nozzle suitable for the cleaning task.
- Align the nozzle with the opening on the device.
- Insert it gently until it fits securely.
- Check that the nozzle is firmly attached before switching the device ON.
Do not force a nozzle into the opening or operate the device with a loosely fitted attachment.
Powering ON
- Make sure the device is not connected to the charger.
- Fit the required nozzle securely.
- Press the Power Button to switch ON the device.
- Select either blower or vacuum mode using its respective button.
Important: The device cannot be used while charging.
Using Blower Mode
- Press the Blower Button to activate airflow.
- Short-press the Blower Button to cycle through the 3 speed levels.
- Use the speed suitable for the surface and cleaning task.
- Stop the blower function before switching to vacuum mode.
Blower mode is suitable for clearing dust from keyboards, computer equipment, car dashboards, AC vents and other hard-to-reach areas.
Using Vacuum Mode
- Press the Vacuum Button to start suction.
- Short-press the Vacuum Button again to switch between the 2 suction speed levels.
- Use the appropriate nozzle for the area being cleaned.
- Stop the vacuum function before switching to blower mode.
Vacuum mode is suitable for collecting dust, debris, crumbs and other loose particles from areas such as car seats, carpets and upholstery.
Important: Vacuum and blower modes cannot operate at the same time. Stop one function before starting the other.
Charging Instructions
- Switch OFF the device.
- Connect a compatible 5V/2A power source to the Type-C charging cable.
- Connect the Type-C end securely to the AirCop charging port.
- Check the indicator light to confirm charging status.
Do not operate the AirCop while it is charging.
Indicator Light Guide
| Indicator Light | Status |
|---|---|
| Green — Solid | Device in use |
| Red — Blinking | Charging |
| Red — Solid | Fully charged |
| Green — Blinking | Low battery |
HEPA Filter & Maintenance
The AirCop includes a washable HEPA filter.
- Switch OFF the device before removing or cleaning the filter.
- Remove the filter and clear accumulated dust.
- The HEPA filter is washable; allow it to dry completely before reinstalling.
- Clean the exterior using a soft, dry cloth only.
- Do not wash the device body with water, alcohol or chemical cleaners.
- Remove the nozzles regularly and clean the air inlet and outlet.
- Do not scratch the air vents with sharp objects.
- Avoid overcharging or deeply discharging the battery.
Blockage Protection
If a nozzle becomes blocked, the device may shut off automatically to help prevent overheating.
- Switch OFF the device.
- Wait 30 seconds.
- Remove and clear the blockage from the nozzle.
- Check that the air inlet and outlet are not obstructed.
- Refit the nozzle securely and restart the device.
Do not insert sharp objects into the air inlet or outlet.
Safety Precautions
- Do not use the device with wet hands.
- Keep the product away from water, splashes and moisture.
- Do not block the air inlet or outlet during use.
- Do not insert objects into the air inlet or outlet.
- Keep the device away from heat sources such as stoves or open flames.
- Do not use near flammable substances such as petrol, gas, paint thinner or sprays.
- Avoid dropping or hitting the product.
- Do not pull, twist or damage the charging cable.
- Stop using the device immediately if it makes unusual noise, produces an unusual smell or overheats.
- Do not open or disassemble the product.
- The device cannot be used while charging.
- Do not use vacuum and blower modes at the same time.
Troubleshooting
| Issue | Possible Cause | Recommended Action |
|---|---|---|
| Device does not turn ON | Battery may be low | Charge the device fully and try again |
| No indicator light while charging | Adapter or Type-C cable connection issue | Check the adapter, power source and cable connection |
| Low battery indication | Battery needs charging | Recharge the device |
| Device shuts off during use | Nozzle may be blocked | Wait 30 seconds, clear the blockage and restart |
| Airflow or suction is weak | Nozzle, inlet or outlet may be obstructed | Switch OFF and clean the affected area |
Still stuck?
If the issue persists after performing all troubleshooting steps, please raise a support request.
Our support team will assist you further.
Support
- Visit: www.portronics.com
- Support Portal: support.portronics.com
Was this article helpful?
That’s Great!
Thank you for your feedback
Sorry! We couldn't be helpful
Thank you for your feedback
Feedback sent
We appreciate your effort and will try to fix the article