TABLE OF CONTENTS
- Product Overview
- Quick Reference
- What's in the Box
- Projector Parts & Ports
- Remote Control Buttons
- Getting Started
- Manual Focus
- Projection Settings
- Network Setup — Wi-Fi
- Bluetooth Setup
- Home Screen Shortcuts
- File Management — USB Drive
- HDMI and USB Video Display Settings
- Language and Keyboard
- Date and Time
- Other Settings
- Application Settings
- Screen Mirroring
- Troubleshooting
- Safety & Care
- Still stuck?
Product Overview
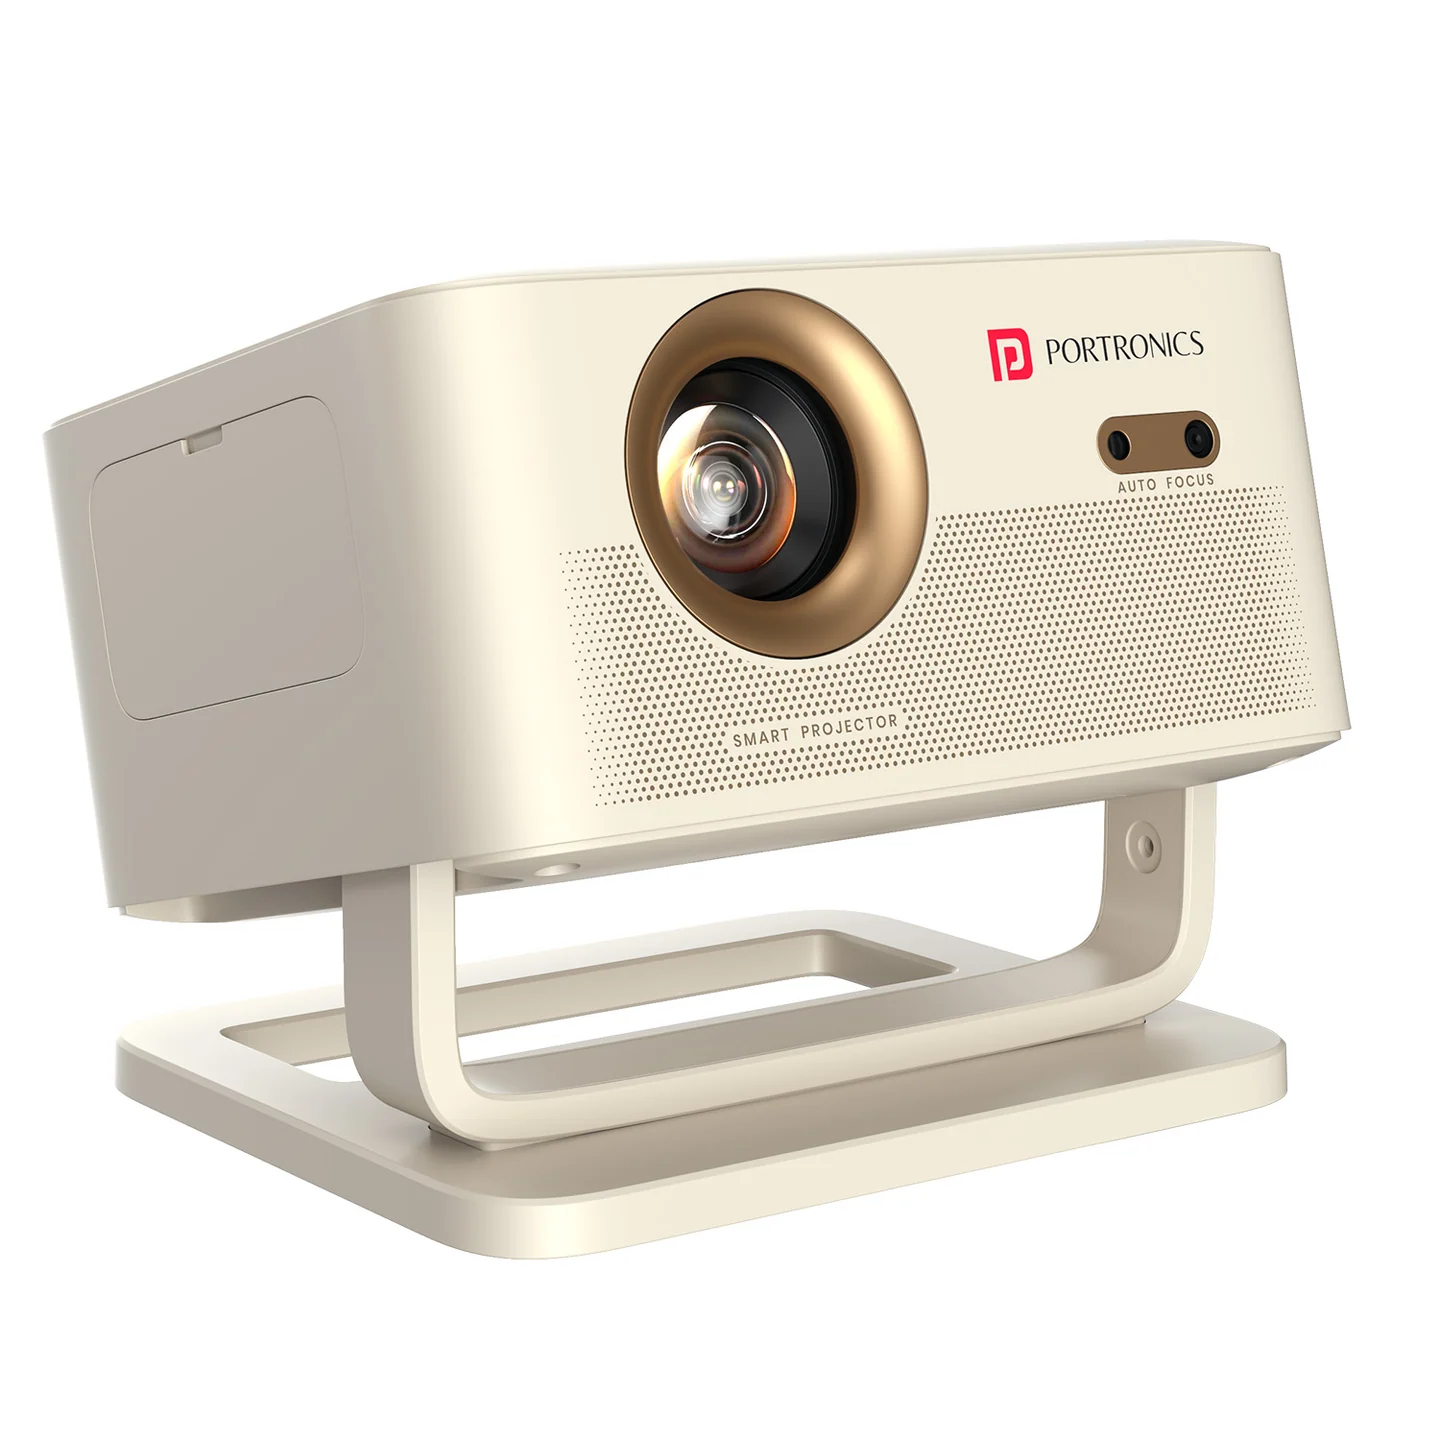
The Portronics Beem 580 (POR 2820) is a smart LED projector with native 1080p Full HD resolution, an Android 14-based interface, dual-band Wi-Fi, Bluetooth, built-in streaming apps, auto focus and keystone correction. It supports HDMI and USB input, wireless screen mirroring and wired phone mirroring.
The projector is designed for projection sizes from 40 to 120 inches. Its built-in 5W speaker provides audio output for everyday viewing.
Quick Reference
| Feature | Details |
|---|---|
| Product | Portronics Beem 580 |
| Product Code | POR 2820 |
| Colour | Beige |
| Product Type | Smart LED Projector |
| Native Resolution | 1920 × 1080p (Full HD) |
| Supported Video Decoding | 4K at up to 30Hz |
| Brightness | 6500 lumens |
| Projection Size | 40–120 inches |
| Aspect Ratio | 16:9 |
| Operating System | Android 14-based |
| CPU | Hisilicon |
| RAM | 1GB |
| Internal Storage | 8GB |
| Wi-Fi | Wi-Fi 6, 2.4GHz / 5GHz |
| Bluetooth | Version 5.4 |
| Built-in Speaker | 5W × 1 |
| Auto Keystone Correction | Yes |
| Input Ports | HDMI, USB, 3.5mm AUX |
| Power Input | AC 2-pin, 110–240V / 50Hz / 1A |
| Power Consumption | 48W |
| Warranty | 1 year |
Resolution note: The projector's native display resolution is 1920 × 1080p. 4K/30Hz refers to supported video decoding, not native 4K projection.
What's in the Box
| Item | Quantity |
|---|---|
| Beem 580 Projector | 1 |
| Remote Control | 1 |
| AC Power Cable | 1 |
| HDMI Cable | 1 |
| Cleaning Tool | 1 |
Remote batteries are not included. Insert compatible batteries into the remote before use.
Projector Parts & Ports
| Part / Port | Function |
|---|---|
| Camera | Supports the projector's automatic image-adjustment functions |
| IR Receiver | Receives signals from the remote control |
| Power Button | Turns the projector ON/OFF |
| Power Socket | Connects the AC power cable |
| HDMI Input | Connects an external HDMI source |
| 3.5mm AUX | Audio connection |
| USB Input | Reads compatible USB storage and supports wired phone mirroring |
| Cleaning Entrance / Side Cover | Provides access for the specified cleaning procedure |
Remote Control Buttons
| Button | Function |
|---|---|
| Power | Turns the projector ON/OFF |
| Mute | Mutes or restores audio |
| Focus + | Increases / adjusts focus |
| Focus − | Decreases / adjusts focus |
| Mouse Control | Switches to mouse control |
| OK | Confirms a selection |
| Up / Down / Left / Right | Navigates menus and items |
| Menu | Opens the menu |
| Return | Goes back to the previous screen |
| Home | Returns to the home screen |
| Volume + | Increases volume |
| Volume − | Decreases volume |
Remote use: Point the remote towards the projector's IR receiver. The supplied guide recommends using the remote within 6 metres and at an angle of approximately 30 degrees.
Getting Started
- Place the projector horizontally and face it towards the projection screen or wall.
- Connect the AC power cable to the projector's power socket.
- Connect the power cable to an appropriate AC outlet.
- Press the Power Button on the projector to turn it ON.
- Use the remote to navigate the home screen and settings.
Tip: Keep the projector horizontal relative to the projection screen for initial setup.
Manual Focus
The remote provides manual focus adjustment.
- Display the projector image on the screen.
- Press Focus + or Focus − on the remote.
- Continue adjusting until the projected image appears clear.
The projector also supports automatic focus according to the product listing. Use the remote's Focus buttons for manual fine adjustment when needed.
Projection Settings
Open Settings → Projection Settings to adjust the picture and installation options.
The supplied settings include:
| Setting | Purpose |
|---|---|
| Colour Temperature | Adjusts the image colour tone |
| Installation Mode | Changes the projection orientation / installation position |
| Device Mode | Selects the projector's device mode |
| Digital Zoom | Adjusts the projected image size digitally |
| Aspect Ratio | Changes the image aspect ratio |
| Auto Focus | Enables automatic focus adjustment |
| Auto Four-Corner Correction | Automatically adjusts the image corners |
| Screen Recognition | Enables screen recognition |
| Intelligent Obstacle Avoidance | Helps the image avoid detected obstacles |
| Manual Keystone | Allows manual keystone adjustment |
| Reset Keystone Correction | Resets keystone adjustments |
Rotating the Projected Image
- Open Settings → Projection Settings.
- Select Installation Mode.
- Choose the projection orientation that matches your setup.
Network Setup — Wi-Fi
- Open Settings → Network Settings.
- Select Wi-Fi Switch and turn Wi-Fi ON.
- Choose the Wi-Fi network you want to connect to.
- Enter the network password.
- Complete the connection.
The projector supports dual-band Wi-Fi (2.4GHz and 5GHz) and Wi-Fi 6.
Bluetooth Setup
- Open Settings → Bluetooth.
- Turn the Bluetooth switch ON.
- Select Search for Bluetooth Devices.
- Choose the Bluetooth device you want to connect.
- Complete pairing on the projector and connected device, if prompted.
Bluetooth can be used to connect compatible external audio devices and accessories.
Home Screen Shortcuts
The home-screen status bar includes the following shortcuts:
| Shortcut | Function |
|---|---|
| Clear Memory | Clears memory / background-app usage using the shortcut |
| Wallpaper | Changes the home-screen background picture |
| Bluetooth | Opens Bluetooth settings |
| Network | Opens network settings |
File Management — USB Drive
- Insert a compatible USB drive into the projector's USB port.
- Open the File Manager icon on the home screen.
- Browse the files stored on the USB drive.
- Open supported files such as video, audio and pictures.
HDMI and USB Video Display Settings
During HDMI or USB video playback, you can adjust display modes and picture effects through Display Settings.
These display settings apply only to HDMI and USB video playback. They do not apply to all projector screens or built-in app screens.
Language and Keyboard
Open Settings → Language and Keyboard to change the system language and input-method settings.
Date and Time
Open Settings → Date and Time Settings to adjust:
- Date
- Time
- Time zone
- Hour format
Other Settings
Open Settings → Other Settings to access:
- External input at boot
- Button sound
- Screen saver
- Scheduled power OFF
- Restore factory settings
- Account management
- Accessibility settings
Use Restore Factory Settings only when you intend to reset the projector's configuration.
Application Settings
Open Settings → Application Settings to:
- Check application information.
- Clear application data.
Clearing app data may remove app-specific settings or locally stored information.
Screen Mirroring
The projector provides several phone screen-mirroring options. Open SCREENCAST from the home page to access the available methods.
1. Android Wireless Mirroring — Transcreen
- Connect the phone and projector to the same Wi-Fi network.
- Open the Transcreen app on the phone.
- Search for the projector device name.
- Select Beem 580.
- Follow the prompts in the app to connect and share the phone screen.
The supplied guide refers to the Transcreen website: https://transcreen.app
2. Miracast Mirroring
- Open SCREENCAST on the projector.
- Select START to open the Miracast mirroring interface.
- Make sure the phone and projector are connected to the same network, as directed in the supplied guide.
- Open the phone's wireless display / screen-mirroring function.
- Search for the projector and select it.
- Follow the on-screen instructions to start sharing.
The exact menu names on the phone may vary by model.
3. Android Wired Mirroring
- Connect the Android phone to the projector's USB port using a USB cable.
- On the first connection, the phone may prompt you to download a mirroring app.
- Scan the displayed QR code or visit https://transcreen.app/linedisplay
- Download and install the required app.
- Accept the mirroring prompt on the phone.
- Start screen sharing.
4. AirPlay Mirroring
- Connect the iPhone and projector to the same Wi-Fi network.
- Open Screen Mirroring on the iPhone.
- Find the projector device name.
- Select the projector and start sharing the screen.
5. Apple Wired Mirroring
- Connect the iPhone to the projector's USB port using a USB cable.
- Follow the connection prompts on the phone.
- Enter any requested device password.
- After the connection is accepted, start sharing the screen.
Troubleshooting
| Issue | Possible Cause | Recommended Action |
|---|---|---|
| Projector does not turn ON | AC power cable is not connected correctly | Check the power socket and AC cable |
| Remote does not respond | Batteries are missing / depleted or remote is not aimed at IR receiver | Insert batteries and point the remote towards the projector |
| Image is blurred | Focus needs adjustment | Use Focus + / Focus − on the remote |
| Image is tilted or distorted | Installation orientation or keystone needs adjustment | Check Installation Mode and keystone settings |
| Wi-Fi does not connect | Wi-Fi is OFF or password is incorrect | Turn Wi-Fi ON and re-enter the network password |
| Bluetooth device does not pair | Bluetooth is OFF or device is not discoverable | Enable Bluetooth and search again |
| USB files do not appear | Drive is not detected or File Manager is not open | Reinsert the USB drive and open File Manager |
| Screen mirroring fails | Phone and projector are not configured for the same method / network | Confirm same network for wireless mirroring and follow the relevant mirroring steps |
| Image orientation is wrong | Installation Mode is incorrect | Change Installation Mode in Projection Settings |
Safety & Care
- Keep the projector away from water and moisture.
- Do not place liquids on the projector.
- Disconnect AC power before cleaning.
- Do not force the remote buttons, ports or side cover.
- Use the supplied cleaning tool / cotton swab procedure for cleaning access.
- Keep the projector horizontal during initial setup, then set Installation Mode as required.
- Use the remote within the recommended 6-metre range and approximately 30-degree angle.
- Remote batteries are not included. Do not mix old and new batteries in the remote.
- Do not place the remote near fire, water or hot locations.
- Remove the remote batteries if the remote will not be used for a long time to reduce the risk of battery leakage.
Still stuck?
If the issue persists after performing all troubleshooting steps, please raise a support request.
Our support team will assist you further.
Support
- Visit: www.portronics.com
- Support Portal: support.portronics.com
Was this article helpful?
That’s Great!
Thank you for your feedback
Sorry! We couldn't be helpful
Thank you for your feedback
Feedback sent
We appreciate your effort and will try to fix the article