TABLE OF CONTENTS
- Product Overview
- Quick Reference
- What's in the Box
- Parts & Controls
- Setting Up the Standard Stand
- Setting Up Desktop Mode
- Power ON/OFF
- Adjusting Fan Speed
- Oscillation
- LED Light
- Charging
- Operating Time by Speed
- Care & Safety
- Still stuck?
Product Overview
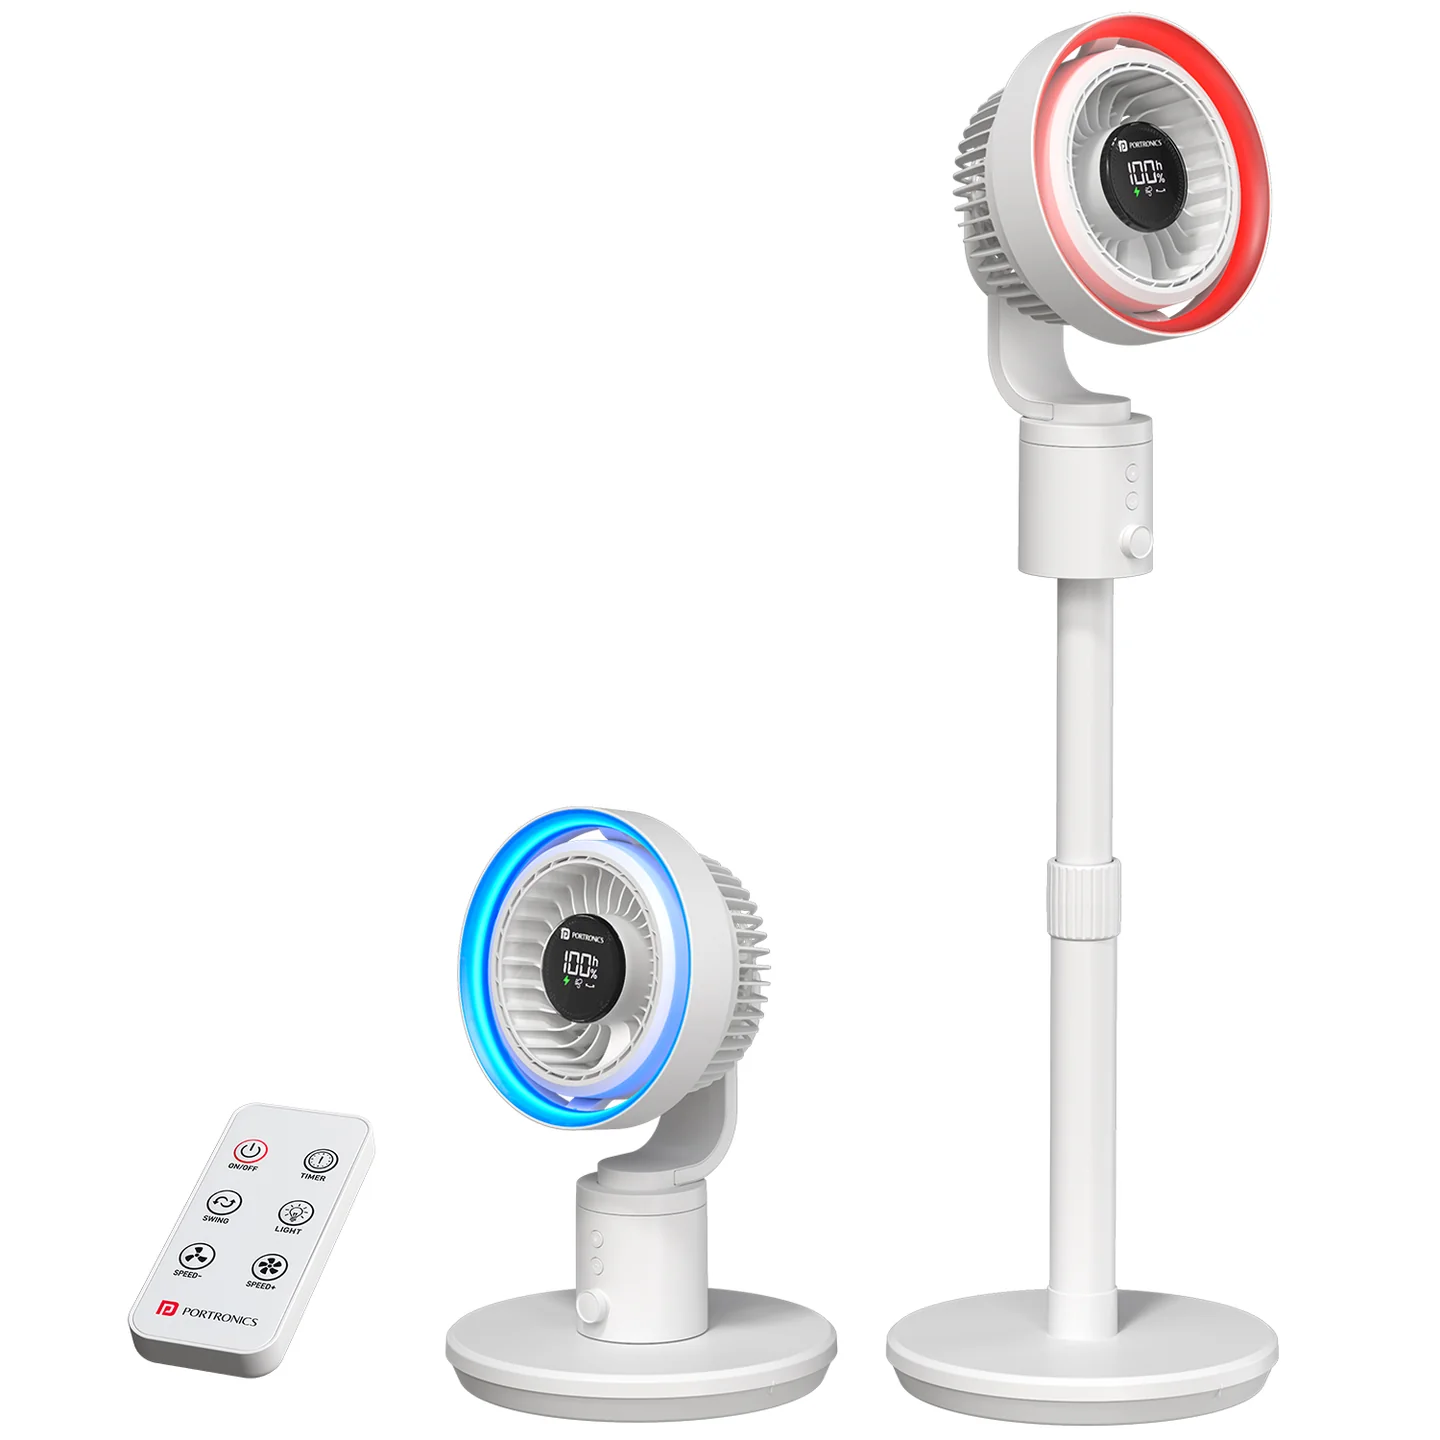
The Portronics Toofan X Pro is a rechargeable oscillating fan with a detachable stand, built-in LED light, digital display and 100 adjustable speed levels. Use it as a standing fan or switch to desktop mode by removing the telescopic rod.
Quick Reference
| Feature | Details |
|---|---|
| Product | Portronics Toofan X Pro |
| Product Code | POR 3573 |
| Battery | 4 × 2000mAh rechargeable lithium batteries |
| Speed | 1–100 adjustable levels |
| Motor | High-speed BLDC, 14,000 RPM |
| Oscillation | Supported |
| LED Light Runtime | Up to 24 hours |
| Charging Port | USB Type-C |
| Charging Input | DC 5V / 3A |
| Charging Time | Approx. 4–5 hours |
| Display | Digital display with battery percentage |
What's in the Box
| Item | Quantity |
|---|---|
| Toofan X Pro Fan | 1 |
| Type-C Charging Cable | 1 |
| Remote | 1 |
| User Manual | 1 |
Parts & Controls
| Part / Control | Function |
|---|---|
| Fan Control Knob / Power Switch | Turns fan ON/OFF and adjusts speed |
| LED Light Switch | Turns the light ON/OFF |
| Oscillation Switch | Enables/disables side-to-side movement |
| Digital Display | Shows fan settings and battery percentage |
| Master Power Switch | Main power control |
| Height Lock Knob | Secures the telescopic rod height |
| Base Lock Knob | Secures the base connection |
| Type-C Port | Charging |
| Remote | Remote operation |
Setting Up the Standard Stand
- Attach the telescopic rod to the main fan unit by rotating it clockwise.
- Insert the rod into the base socket.
- Align the groove on the rod with the raised notch inside the socket.
- Tighten the locking nut securely.
- Place the fan on a stable, level surface.
Setting Up Desktop Mode
- Carefully remove the telescopic rod and store it safely.
- Insert the main fan unit directly into the desktop base.
- Rotate the locking knob clockwise until it is firmly secured.
- Match the thread groove with the raised point inside the socket.
- Check that the fan is stable before switching it on.
Power ON/OFF
Press the fan control knob once to turn the fan ON or OFF. Make sure the master power switch is ON before operating the fan.
Adjusting Fan Speed
Rotate the fan control knob to select any speed from 1 to 100. Start at a lower setting and increase it as needed.
Oscillation
Press the Oscillation Switch to enable or disable side-to-side movement.
LED Light
Press the LED Light Switch to turn the built-in light ON or OFF. The manual lists LED light runtime of up to 24 hours.
Charging
- Connect the Type-C charging cable to the fan.
- Connect the cable to a certified compatible 5V power adapter.
- Switch on the master power switch to view the battery percentage on the display.
- Allow approximately 4–5 hours for charging.
Operating Time by Speed
Approximate runtimes:
| Speed | Approx. Runtime |
|---|---|
| 1 | 12–13 hours |
| 10 | 10–11 hours |
| 20 | 7–8 hours |
| 50 | 4.5–5 hours |
| 80 | 3.5–4 hours |
| 100 | 3–3.5 hours |
Higher speeds use more battery. Actual runtime also varies with battery condition, oscillation, and light use. The cordless runtime is up to 13 hours.
Care & Safety
- Use a certified compatible charging adapter.
- Do not insert fingers or objects into the fan while it is operating.
- Keep the fan away from water, fire and extreme heat.
- Do not use the fan on an unstable surface.
- Switch it OFF before cleaning or storing.
- Keep it out of reach of small children.
- Do not disassemble or modify the product.
- Ensure the stand and locking knobs are secure before use.
- Keep the fan blades unobstructed.
Still stuck?
If the issue persists after performing all troubleshooting steps, please raise a support request.
Our support team will assist you further.
Support
- Visit: www.portronics.com
- Support Portal: support.portronics.com
Was this article helpful?
That’s Great!
Thank you for your feedback
Sorry! We couldn't be helpful
Thank you for your feedback
Feedback sent
We appreciate your effort and will try to fix the article