TABLE OF CONTENTS
- Product Overview
- Quick Reference
- What's Included
- Parts & Controls
- Phone Compatibility and Mounting
- Switching the Selfie Stick ON and OFF
- Pairing the Bluetooth Remote
- Taking Photos
- Using the Remote for Video
- Removing the Detachable Remote
- Opening the Tripod
- Extending the Selfie Stick
- Adjusting the Shooting Angle
- Using the Detachable Fill Light
- Remote Sleep and Automatic Shutdown
- Replacing the Remote Battery
- Troubleshooting
- Safety & Care
- Still stuck?
Product Overview
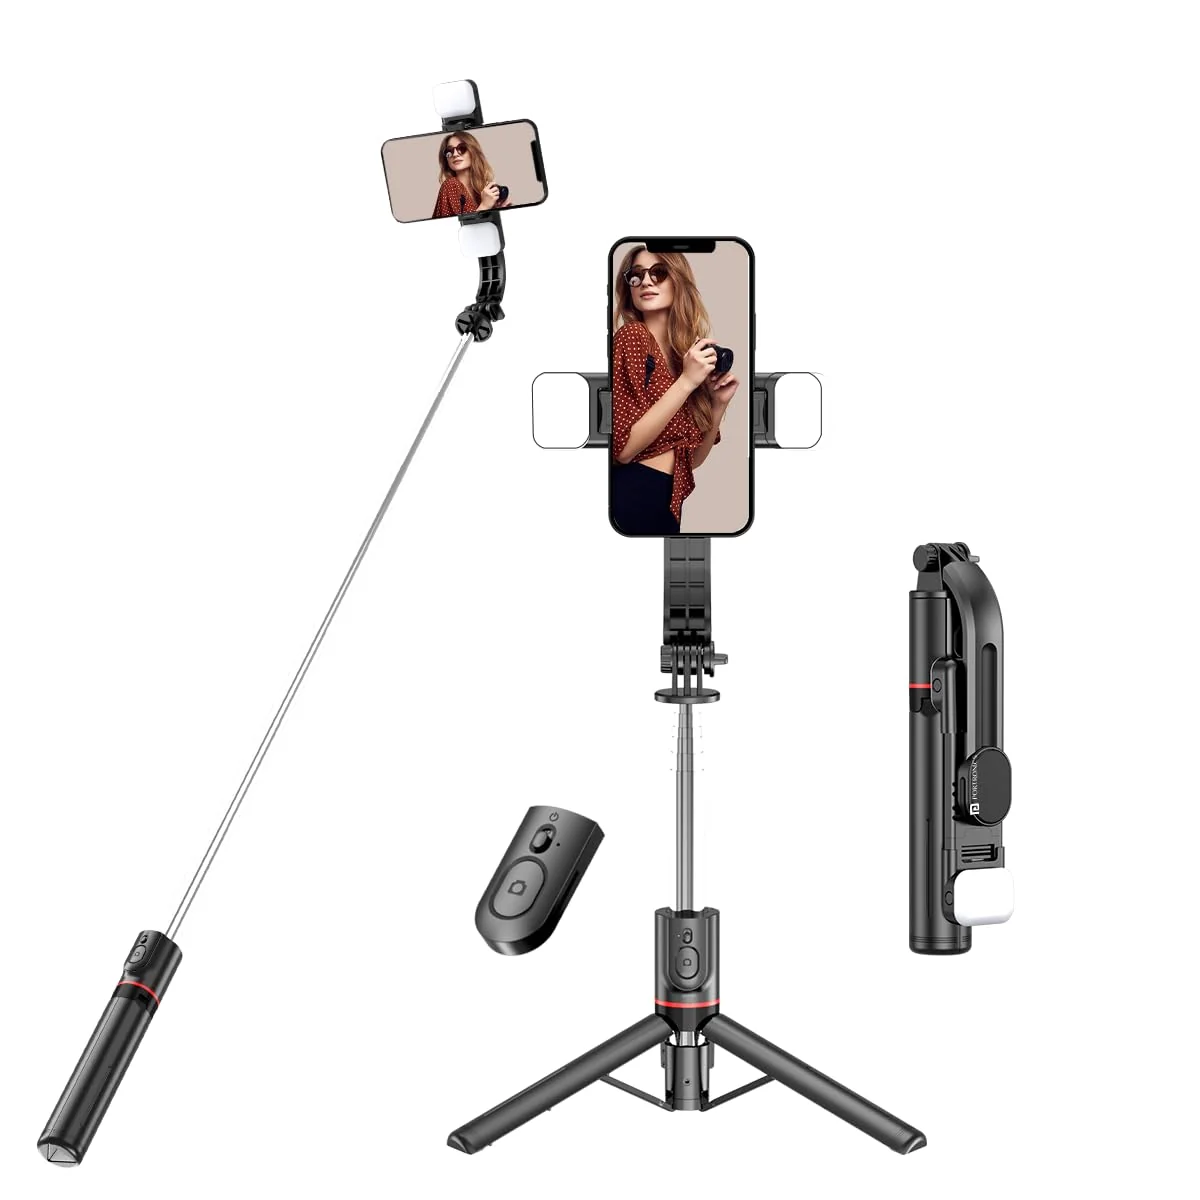
The Portronics Lumistick Smart Selfie Stick is a portable selfie stick with a tripod stand, detachable Bluetooth remote and detachable fill lights. It supports iOS and Android smartphones and can be used for selfies, group photos, vlogging and video recording.
The stainless-steel extension pole reaches up to 1160mm. The phone holder rotates through 360° and the head can be adjusted through 270° to help frame shots at different angles.
Quick Reference
| Feature | Details |
|---|---|
| Product | Portronics Lumistick - Smart Selfie Stick |
| Product Codes | POR 2040 (Black), POR 2360 (White) |
| Main Material | ABS + Stainless Steel |
| Folded Length | 210mm |
| Extended Length | 1160mm |
| Product Size | 210 × 59 × 38mm |
| Product Weight | 220g |
| Phone Compatibility | iOS and Android |
| Supported Phone Width | 64–100mm (6.4–10cm) |
| Bluetooth | Version 5.3 |
| Phone Holder Rotation | 360° |
| Head Rotation | 270° |
| Fill Light Modes | White, Warm and Natural; Soft and Bright levels |
| Remote Battery | Replaceable CR1632 |
| Warranty | 6 months |
What's Included
The product sheet lists:
| Item | Quantity |
|---|---|
| Smart Selfie Stick | 1 |
| User Manual | 1 |
The product listing also states that a USB cable is included for charging. Confirm the cable and accessories supplied in your retail package.
Parts & Controls
| Part / Control | Function |
|---|---|
| Stainless-Steel Pole | Extends the selfie stick up to 1160mm |
| Phone Clamp | Holds the smartphone |
| Power Key | Slides UP to turn the stick / remote ON and DOWN to turn it OFF |
| Photo Key | Takes photos or controls camera video |
| Fill Light | Provides additional illumination |
| Fill-Light Power Button | Turns the light ON/OFF and changes light settings |
| Tripod Stand | Opens from the handle to support hands-free use |
| Detachable Bluetooth Remote | Can be removed from the stick for remote capture |
Phone Compatibility and Mounting
The product supports iOS and Android phones with a stated width of 64–100mm (6.4–10cm).
- Slide or push the phone clamp upward to open it.
- Place the phone securely inside the holder.
- Release the clamp so it grips the phone.
- Check that the phone is secure before extending the pole or opening the tripod.
Switching the Selfie Stick ON and OFF
- Slide the Power Key UP to turn the power ON.
- Slide the Power Key DOWN to turn the power OFF.
When switched ON, the remote indicator flashes while it searches for a phone to pair.
Pairing the Bluetooth Remote
- Turn ON Bluetooth on your phone.
- Slide the Power Key UP to turn ON the selfie stick / remote.
- The indicator light flashes quickly to show pairing mode.
- Open your phone's Bluetooth settings.
- Search for Selfie.
- Select Selfie to connect.
- The indicator light turns OFF after successful pairing.
The official product listing specifies Bluetooth 5.3.
Taking Photos
- Make sure the selfie stick is paired with your phone.
- Open the phone's camera application.
- Press the Photo Key.
- The indicator light flashes and the camera takes a picture.
Using the Remote for Video
- Connect the Bluetooth remote to your phone.
- Open the phone's Camera app or another camera app.
- Switch to Video mode.
- Press the remote button to start recording.
- Press the button again to stop recording.
Removing the Detachable Remote
- Pull the stainless-steel pole out first as shown in the product diagram.
- Slide the remote upwards to remove it from the stick.
- Use the detached remote for taking photos after it is connected to your phone.
Opening the Tripod
- Hold the selfie stick securely.
- Open the handle outward to convert it into tripod mode.
- Spread the tripod legs fully.
- Place the tripod on a flat, stable surface.
- Check that the stand is stable before releasing the phone.
Extending the Selfie Stick
- Hold the stick securely.
- Pull the stainless-steel pole upwards to extend it.
- Extend it to the required length, up to 1160mm.
- Check that the pole is stable before using the phone.
Do not pull the pole beyond its intended travel or apply excessive force.
Adjusting the Shooting Angle
- 360° phone-holder rotation for horizontal or vertical shooting.
- 270° head rotation for adjusting the shooting angle.
Adjust the holder gently and check that the phone remains securely clamped.
Using the Detachable Fill Light
The fill light offers three colour-temperature modes, each with Soft and Bright settings.
| Light Mode | Available Levels |
|---|---|
| White Light | Soft, Bright |
| Warm Light | Soft, Bright |
| Natural Light | Soft, Bright |
Switching the Fill Light ON
- Press and hold the fill-light Power Button for approximately 2 seconds.
- The light turns ON.
- Press the button again to cycle through the lighting settings.
Switching the Fill Light OFF
Press and hold the fill-light Power Button at any time to turn the light OFF.
Charging the Fill Light
The fill-light charging indicator is as follows:
| Indicator | Status |
|---|---|
| Red light ON | Charging |
| Red light OFF | Fully charged |
Remote Sleep and Automatic Shutdown
| Situation | Remote Behaviour |
|---|---|
| Switched ON but not paired / no operation | Automatically powers down after 5 minutes |
| Paired but inactive | Enters sleep mode after 10 minutes |
| No activity after entering sleep | Shuts down after a further 10 minutes |
| Waking from sleep | Press any button to wake the device |
| Automatic reconnection | Reconnects to the previously paired phone when switched ON or woken, if the phone Bluetooth is enabled |
Replacing the Remote Battery
Replace the battery with the same specified type.
- Install it in the correct orientation.
- Do not expose batteries to direct sunlight, fire or excessive heat.
- Keep coin-cell batteries away from children.
- Dispose of used batteries responsibly.
Troubleshooting
| Issue | Possible Cause | Recommended Action |
|---|---|---|
| Remote does not connect | Bluetooth is OFF or remote is not in pairing mode | Turn ON Bluetooth, slide the Power Key UP and search for Selfie |
| Indicator keeps flashing | Pairing has not completed | Select Selfie in the phone's Bluetooth list |
| Remote shuts down | 5-minute unpaired inactivity timer | Switch it ON again and pair |
| Remote enters sleep mode | 10 minutes of paired inactivity | Press any button to wake it |
| Fill light does not turn ON | Light is OFF or battery is low | Hold the light button for 2 seconds and check the charge |
| Fill light does not change mode | Button action not performed | Press the light button again to cycle modes |
| Phone is loose | Clamp is not gripping phone width | Reposition the phone within the 64–100mm range |
| Tripod is unstable | Legs are not fully opened or surface is uneven | Spread the legs and use a flat, stable surface |
Safety & Care
- Keep the phone securely clamped before extending or moving the selfie stick.
- Open the tripod fully and place it on a stable surface.
- Do not extend the pole beyond its 1160mm limit.
- Do not apply excessive force to the clamp, pole, remote or tripod.
- Keep the product and fill light away from water and moisture.
- Do not expose the CR1632 battery to sunlight, fire or excessive heat.
- Keep button batteries away from children.
- Switch OFF the product when not in use.
Still stuck?
If the issue persists after performing all troubleshooting steps, please raise a support request.
Our support team will assist you further.
Support
- Visit: www.portronics.com
- Support Portal: support.portronics.com
Was this article helpful?
That’s Great!
Thank you for your feedback
Sorry! We couldn't be helpful
Thank you for your feedback
Feedback sent
We appreciate your effort and will try to fix the article